markdown
因為 https 需要替換憑證才能取得資料,所以需要將 Burp Suite 的憑證安裝到瀏覽器中,這篇文章就按步驟在 firefox 中安裝 burp suite 產生的憑證,它可以抓取到 https 中的請求資料。
## 啟動Burp,確認代理已啟動 Proxy
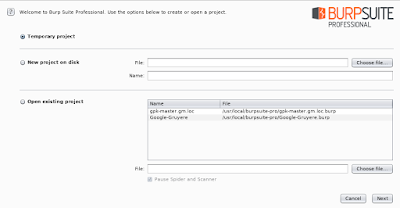
Step 1. 開一個暫時專案,下一步(Next)
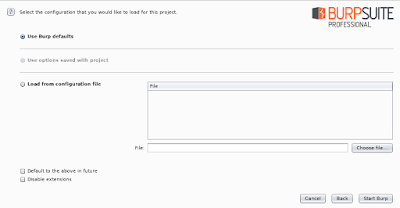
Step 2. 使用預設設定,開啟(Start Burp)
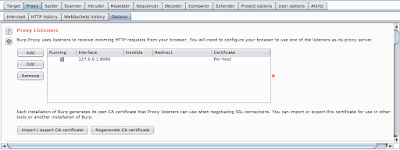
Step 3. 檢查代理監聽(Proxy Listeners)是啟動狀態
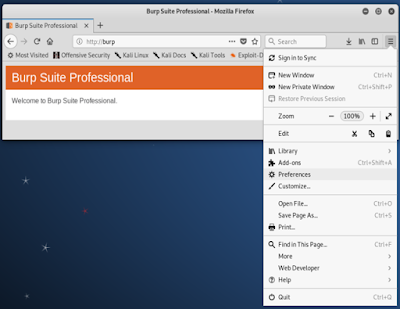
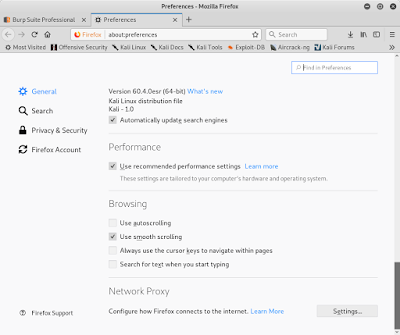
Step 4. 開啟瀏覽器的設定(Preferences)
Step 5. 開啟 一般(General)/網路代理(Network Proxy) 的設定(Settings)
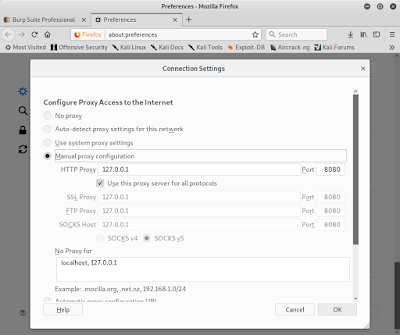
Step 6. 填入手動設定代理。 host: 127.0.0.1, port: 8080,勾選「全部通訊協定使用這個代理(Use this proxy server for all protocols)」,按確定(OK)
## 下載憑證並安裝到瀏覽器
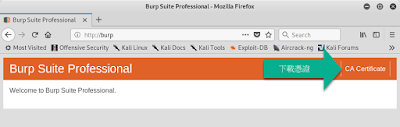
Step 1. 瀏覽器開啟 http://burp
Step 2. 下載憑證
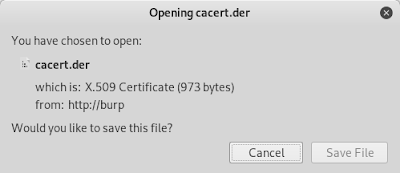
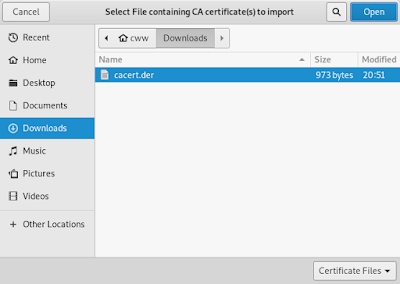
Step 3. 將 cacert.der 儲存到 `~/download/cacert.der` 資料夾
Step 4. 開啟瀏覽器的設定(Preferences)
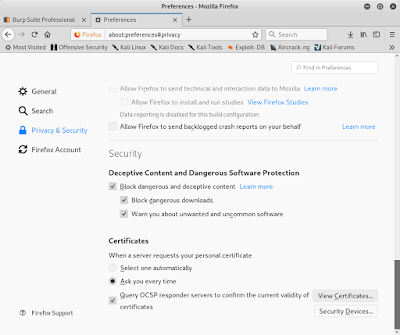
Step 5. 開啟「隱私和安全(Privacy & Secruity)」,找到憑證(Certificates)區段,開啟「檢視憑證(View Certificates...)」
Step 6. 選擇 Authorities 頁籤
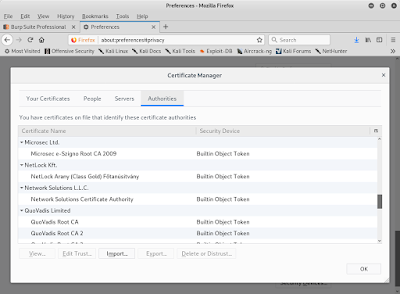
Step 7. 匯入(Import) 步驟2下載的憑證
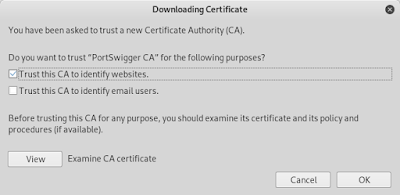
Step 8. 勾選「信任這個網站(Trust this CA to identity websites)」,按確定(OK)
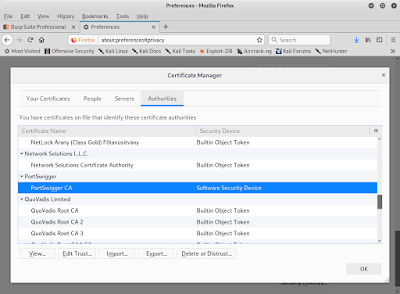
Step 9. 能在列表中看到剛才匯入的憑證「PortSwigger CA」
Step 10. 瀏覽器開啟 `https://www.google.com`,在網址列的驚嘆號圖型能看到網站使用的憑證被 Brup 換成 PortSwigger CA 了

Step 11. 至此在使用 Burp 時就能攔到 https 的包嘍。

 Step 2. 使用預設設定,開啟(Start Burp)
 Step 3. 檢查代理監聽(Proxy Listeners)是啟動狀態
 Step 4. 開啟瀏覽器的設定(Preferences)
 Step 5. 開啟 一般(General)/網路代理(Network Proxy) 的設定(Settings)
 Step 6. 填入手動設定代理。 host: 127.0.0.1, port: 8080,勾選「全部通訊協定使用這個代理(Use this proxy server for all protocols)」,按確定(OK)
 ## 下載憑證並安裝到瀏覽器
Step 1. 瀏覽器開啟 http://burp
Step 2. 下載憑證
## 下載憑證並安裝到瀏覽器
Step 1. 瀏覽器開啟 http://burp
Step 2. 下載憑證
 Step 3. 將 cacert.der 儲存到 `~/download/cacert.der` 資料夾
 Step 4. 開啟瀏覽器的設定(Preferences)
 Step 6. 選擇 Authorities 頁籤
 Step 7. 匯入(Import) 步驟2下載的憑證
 Step 8. 勾選「信任這個網站(Trust this CA to identity websites)」,按確定(OK)
 Step 9. 能在列表中看到剛才匯入的憑證「PortSwigger CA」
 Step 10. 瀏覽器開啟 `https://www.google.com`,在網址列的驚嘆號圖型能看到網站使用的憑證被 Brup 換成 PortSwigger CA 了
 Step 11. 至此在使用 Burp 時就能攔到 https 的包嘍。

沒有留言:
張貼留言